
A well-researched film that illustrates a problem and offers practical solutions can be a powerful catalyst for change.
The grammar of filmmaking
Just like spoken and written language, filmmaking too has its own grammar. By following a few simple rules and tips you can produce footage that can be edited together into a professional-looking video. On the other hand, shooting without heeding these tips will produce a meaningless jumble of images that will be very difficult to string together into a coherent video.
Shooting sequences
Every film is made up of several ‘mini stories’ strung together in a logical way to make up the whole. Each of these mini stories is known as a ‘sequence’. Each sequence is made up of several ‘shots’. There are several different types of shots that have to be recorded in order to compile an interesting sequence.
If everything you shoot is from a similar angle and using a similar focal length of the lens, the film will be very boring and difficult to edit. In general, every time you film something, record at least three types of shot sizes for each scene: Wide-Shot; Mid-Shot; Close-Up. (See examples below)
If you are shooting a scene of an excavator scooping soil from a hillside at a mine, you should shoot at least three shots of this scene with different compositions:
- Shot size # 1: wide-shot – this should show the entire hill or a large part of the hill with the excavator working in it. This will be your ‘master’ shot or ‘establishment’ shot that shows the viewer the complete picture.
- Shot size # 2: mid-shot – this should be composed to show just the excavator with a little bit of background around it.
- Shot size # 3: close-up – this will show just the scoop excavating the soil.
While one wide-shot and one single mid-shot of a scene may sometimes be enough, it is always useful to have lots of close-ups. Apart from the close-up of the scoop, what other close-ups can you get? Here are a couple of examples:
- A close-up of the tractor-like ‘catterpillar feet’ of the excavator moving back and forth.
- A close-up of the excavator operator at the controls.
Cutaway: A ‘cutaway’ is a very useful kind of shot. For instance, in the wide shot of the scene, if there is a supervisor standing on the ground looking at the excavator at work, you could get a separate shot of the supervisor. This can then be inserted into the sequence. Here too, if you adopt three shot sizes, wide-shot, mid-shot and close-up of the supervisor, it will be very useful during editing. Or let’s say, in the wide shot there is a tree with monkeys in the frame, you can get several shots of the monkeys looking at the excavator, or running away from it to use as cutaways. For a more detailed explanation of cutaways see this Wikipedia article.
Shooting from different angles
Apart from Wide-Shots, Mid-Shots, Close-Ups and Cutaways, it is very useful to shoot each scene from as many different angles as possible. Having got the standard shots of the excavator working in the mine from a standard angle, think about other possible angles. For instance, can you crouch on the ground and get some wide-angle shots looking up at the excavator to get a dramatic perspective? Or can you go up a nearby hill and shoot looking down at the excavator? These shots will make the scene much more interesting visually, and will give the editor plenty of choices while putting the film together. When shooting the scene from different angles, remember to shoot different shot sizes as well. Always remember this mantra: Wide-Shot, Mid-Shot, Close-ups, Cutaways, Different Angles.
Some general shooting tips
Shots that are shaky, out of focus, badly exposed, zooming in and out or badly composed draw unnecessary attention to themselves, and come in the way of the viewer getting involved with the content of the film. So the goal of every cameraperson should be to make sure that each shot is as technically perfect as possible. Here are some general dos and don’ts.
- Keep the camera lens clean at all times as otherwise dirt spots will be visible on the screen, especially in wide angle shots (see: how to clean a camera lens).
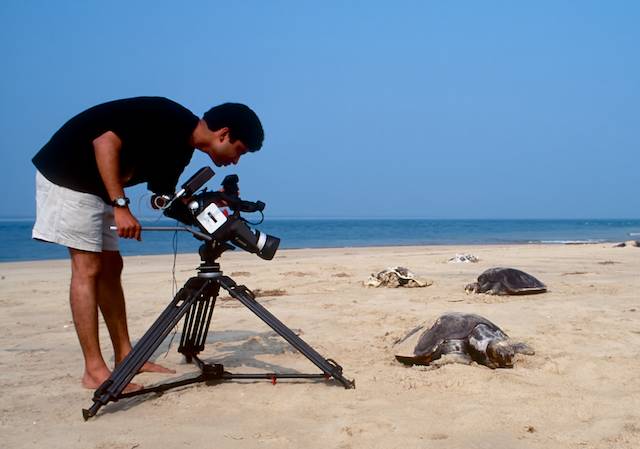
- Use a tripod whenever possible to get steady shots.
- If a tripod is not practical in a particular location, use a monopod, beanbag, car window or tree branch to steady the camera. Hand-hold the camera as a last resort. Just because it’s called a Handycam does not mean that it should be handheld all the time!
- Generally, it is advisable to shoot all static subjects (a scenery for instance) with a tripod. Otherwise the jiggling of the camera will draw attention to itself.
- When panning the camera (preferably on a tripod with a friction or fluid head), always keep the lens at wide angle and pan slowly and smoothly. Let the camera roll for 10 seconds before the start of the pan. Then pan slowly. After the pan ends, let the camera roll for 10 seconds. Don’t do lengthy180 degree pans as they are generally unusable. Pan the camera only when there is a reason for it (for instance, when you want to show an extent of habitat or the extent of destruction of a habitat). A pan should neither be too short nor too long,. A 10 second pan of a habitat is usually adequate (that means 10 seconds before beginning the pan, 10 seconds of panning and 10 seconds after the camera has stopped panning, to make a shot of 30 seconds duration. This can be then trimmed as needed during the editing). Even with a good, professional fluid head tripod, a good pan is not easy to achieve. Practice makes perfect. When in doubt, do two or three takes of the same shot.
After the shooting ends
- Once the shooting is completed, transfer all of the material that you’ve shot to a computer hard drive, retaining the original quality of the video (ie., do not use any compression during the transfer). Once you’ve done this successfully, make one more back up on another hard drive. If you’ve shot the original material on video tape, compact flash card or SDHC card, it may be best not to erase these until your final edit is over. Store them safely, away from magnetic fields (don’t keep them near a TV or speakers as the magnets in these devices can erase the tape or card).
- Watch all the footage several times to familiarize yourself with the material and assemble all the good shots together according to category (ie., scenery, wildlife, mining shots etc.).
- Start writing the script.
- Once you have a rough script, the editing can begin.
- From this stage, the edited film and the script will evolve in tandem until you have finished the editing.
Older Comments 2
This is really a nice film. Thanks so much for this. This movie teaches lot of things regarding tigers and nature conservation
Good site to learn more about TIGER’S.